Stellen Sie in NodeJS eine Verbindung zur MySQL-Datenbank her
1. Install MySQL Driver
Zuerst brauchen Sie ein Projekt NodeJS erstellen, z.B hier stelle ich ein Projekt mit dem Name vom NodeJSMySQL.
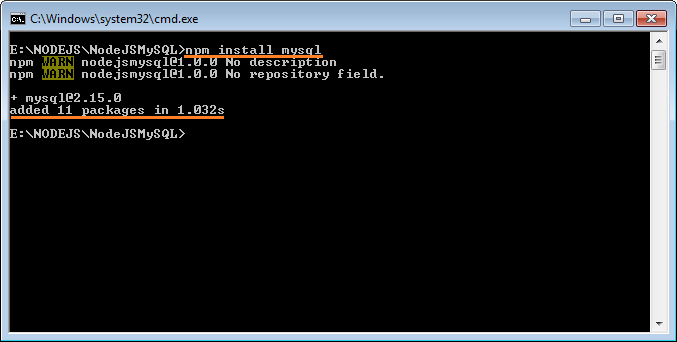
Zunächst brauchen Sie die Bibliothek MySQL für Ihr Projekt installieren. Öffnen Sie das Fenster CMD und machen Sie CD zum Hauptverzeichnis des Projekt und führen Sie den folgenden Command durch:
npm install mysql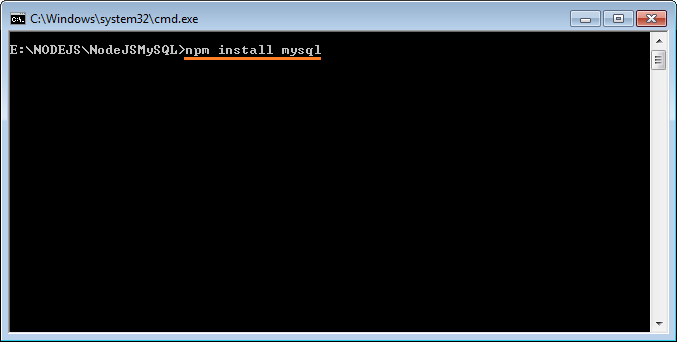
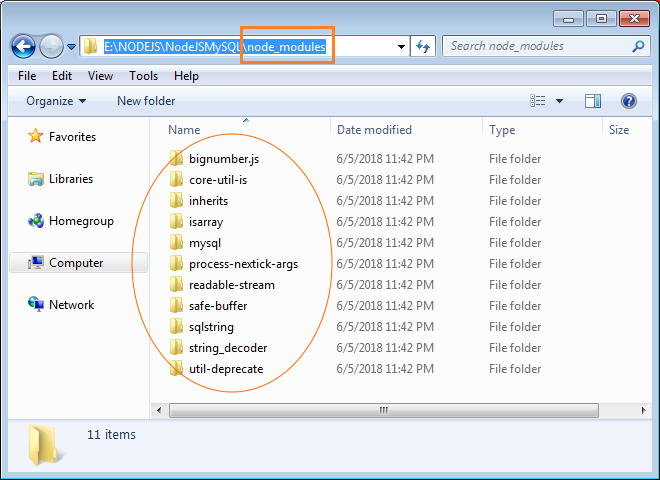
Nach der Installation wird ein Verzeichnis node_modules auf Ihrem Projekt erstellt werden. Der Verzeichnis enthaltet die notwendigen Bibliotheke damit Ihre Applikation mit der Datenbank MySQL verbinden kann:
2. Connect MySQL
Im Schritt oben haben Sie ein Projekt erfolgreich erstellt und die Bibliotheke MySQL für das Projekt installiert. Jetzt erstellen Sie ein kleines Beispiel, das mit der Datenbank MySQL verbinden. OK, Die File connection-example.js erstellen:
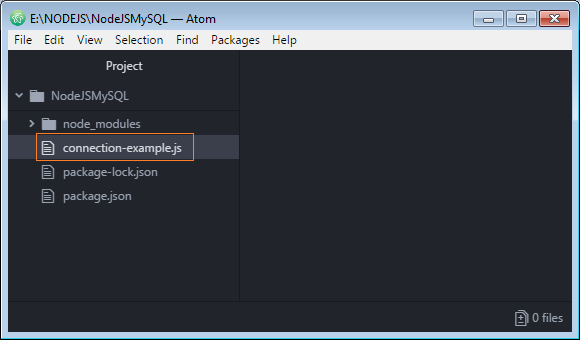
connection-example.js
var mysql = require('mysql');

console.log('Get connection ...');

var conn = mysql.createConnection({
  database: 'mytestdb',
  host: "localhost",
  user: "root",
  password: "12345"
});

conn.connect(function(err) {
  if (err) throw err;
  console.log("Connected!");
});
Das Beispiel durchführen
node connection-example.js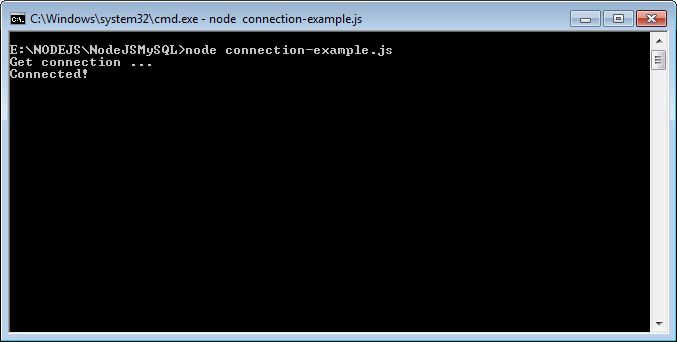
Error: ER_NOT_SUPPORTED_AUTH_MODE
Bei der Durchführung des Beispiel oben können Sie eine Fehleranmeldung wie folgend bekommen:
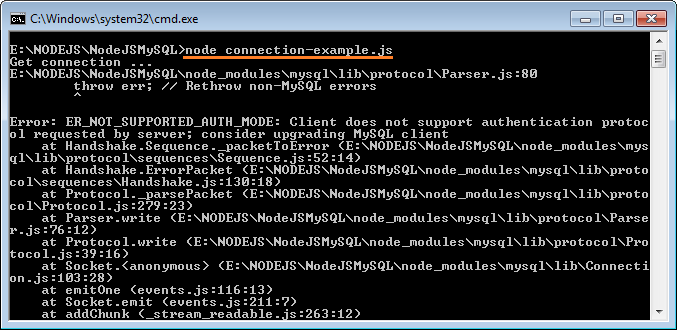
** Error **
E:\NODEJS\NodeJSMySQL\node_modules\mysql\lib\protocol\Parser.js:80
        throw err; // Rethrow non-MySQL errors
        ^

Error: ER_NOT_SUPPORTED_AUTH_MODE: Client does not support authentication protocol requested by server; consider upgrading MySQL client
    at Handshake.Sequence._packetToError (E:\NODEJS\NodeJSMySQL\node_modules\mysql\lib\protocol\sequences\Sequence.js:52:14)
    at Handshake.ErrorPacket (E:\NODEJS\NodeJSMySQL\node_modules\mysql\lib\protocol\sequences\Handshake.js:130:18)
    at Protocol._parsePacket (E:\NODEJS\NodeJSMySQL\node_modules\mysql\lib\protocol\Protocol.js:279:23)
    at Parser.write (E:\NODEJS\NodeJSMySQL\node_modules\mysql\lib\protocol\Parser.js:76:12)
    at Protocol.write (E:\NODEJS\NodeJSMySQL\node_modules\mysql\lib\protocol\Protocol.js:39:16)
    at Socket.<anonymous> (E:\NODEJS\NodeJSMySQL\node_modules\mysql\lib\Connection.js:103:28)
    at emitOne (events.js:116:13)
    at Socket.emit (events.js:211:7)
    at addChunk (_stream_readable.js:263:12)
    at readableAddChunk (_stream_readable.js:250:11)
    --------------------
    at Protocol._enqueue (E:\NODEJS\NodeJSMySQL\node_modules\mysql\lib\protocol\Protocol.js:145:48)
    at Protocol.handshake (E:\NODEJS\NodeJSMySQL\node_modules\mysql\lib\protocol\Protocol.js:52:23)
    at Connection.connect (E:\NODEJS\NodeJSMySQL\node_modules\mysql\lib\Connection.js:130:18)
    at Object.<anonymous> (E:\NODEJS\NodeJSMySQL\connection-example.js:11:6)
    at Module._compile (module.js:652:30)
    at Object.Module._extensions..js (module.js:663:10)
    at Module.load (module.js:565:32)
    at tryModuleLoad (module.js:505:12)
    at Function.Module._load (module.js:497:3)
    at Function.Module.runMain (module.js:693:10)
Der Grund des Fehler oben liegt darin, dass Sie die zu neu Datenbank MySQL verwenden (version >= 8.x). Die alten Versionen MySQL (5.x) benutzt das Bestätigungsplugin (authentication plugin) wie SHA256_PASSWORD. Die Version MySQL 8.x benutzt das Bestätigungsplugin wie SHA2_PASSWORD. Die Bibliothek NodeJS MySQL ändert noch nicht, sie benutzt gerade das Bestätigungsplugin wie SHA256_PASSWORD und unterstützt SHA2_PASSWORD nich nicht.
Release | General availability | Latest minor version | Latest release | End of support |
5.1 | 2008-11-14 | 5.1.73 | 2013-12-03 | December 2013 |
5.5 | 2010-12-03 | 5.5.60 | 2018-04-19 | December 2018 |
5.6 | 2013-02-05 | 5.6.40 | 2018-04-19 | February 2021 |
5.7 | 2015-10-21 | 5.7.22 | 2018-04-19 | October 2023 |
8.0 | 2018-04-19 | 8.0.11 | 2018-04-19 | N/A |
Um den obengemeinten Fehler zu überwinden, öffnen Sie das Fenster "MySQL Command Line Client" und das folgende Command durchführen:
# Syntax:

ALTER USER 'my_username'@'my_host' IDENTIFIED WITH 'mysql_native_password' BY 'my_password';


# Example:

ALTER USER 'root'@'localhost' IDENTIFIED WITH 'mysql_native_password' BY '12345';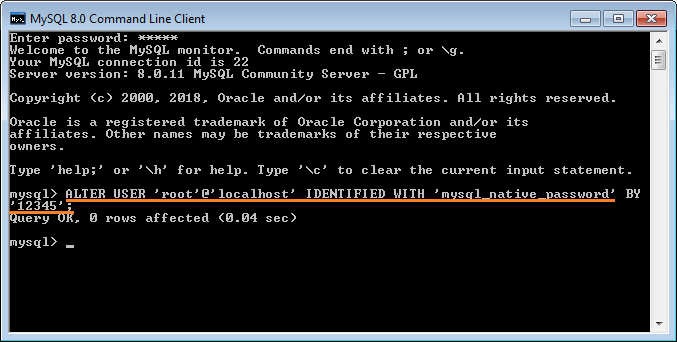
Anders gesagt, Sie können ein Objekt Connection aus einem connection_string auch erstellen:
** Create Connection from ConnectionString **
var connString = 'mysql://myuser:mypass@myhost/mdb?charset=utf8_general_ci&timezone=-0700';

var conn = mysql.createConnection(connString);
3. Examplle: query(sql, callback)
NodeJS MySQL API verwendet die Methode query um alle Aktionen mit der Datenbank durchzuführen. Sie fasst um:
- DDL: Create DB, Table, ...
- DML: Insert, Update, Query, Call Function, Procedure,...
** query method **
// query method:

query(sql, [values], callback)

// Example:

query(sql, [values], function(err, rows, fields)  {

});
Im folgenden Beispiel: wir werden in die Datenbank MySQL verbinden und die Manipulation mit der Kode durchführen:
- Drop die Tabelle EMPLOYEES machen wenn sie existiert.
- Die Tabelle EMPLOYEES wieder erstellen.
- Ein Rekord (record) in die Tabelle EMPLOYEES einfügen.
first-example.js
var mysql = require('mysql');
var conn = mysql.createConnection({
database: 'mytestdb',
host: "localhost",
user: "root",
password: "12345"
});
conn.connect(function(err) {
if (err) {
throw err;
}
console.log("Connected!");
// Drop EMPLOYEES table if Exists!!
var sql1 = "DROP TABLE IF EXISTS Employees ";
conn.query(sql1, function(err, results) {
if (err) throw err;
console.log("Table EMPLOYEES dropped");
});
// Create EMPLOYEES Table.
var sql2 = "CREATE TABLE Employees " +
" (Id INT not null AUTO_INCREMENT, " +
" Emp_No VARCHAR(20), " +
" Full_Name VARCHAR(255), " +
" Hire_Date DATE, " +
" PRIMARY KEY (Id) )";
conn.query(sql2, function(err, results) {
if (err) throw err;
console.log("Table Employees created");
});
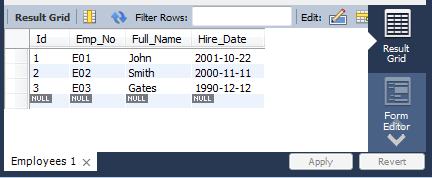
var empNos = ["E01", "E02", "E03"];
var fullNames = ["John", "Smith", "Gates"];
var hireDates = ["22/10/2001", "11/11/2000", "12/12/1990"];
// Insert Datas to EMPLOYEES.
for (var i = 0; i < empNos.length; i++) {
var sql3 = "Insert into Employees (Emp_No, Full_Name, Hire_Date) " //
+
" Values ('" + empNos[i] + "', '" + fullNames[i] + "', STR_TO_DATE('" + hireDates[i] + "', '%d/%m/%Y') )";
conn.query(sql3, function(err, results) {
if (err) throw err;
console.log("Insert a record!");
});
}
});Das Beispiel laufen
node first-example.js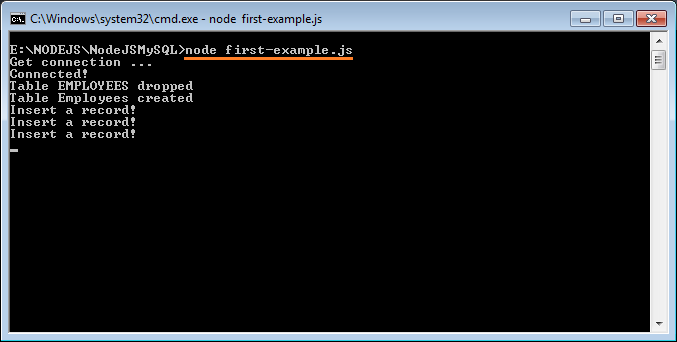
Phương thức mysql.format(sql, replaces) giúp bạn chuẩn bị một mệnh đề SQL (SQL Statement), nó giúp bạn tạo ra một mênh đề SQL đơn giản và dễ nhìn hơn:
** mysql.format(sql_template, replaces) **
// Select * from EMPLOYEES where HIRE_DATE > STR_TO_DATE( '20/11/1995' , '%d/%m/%Y')
var sql_template = "Select * from ?? where ?? > STR_TO_DATE( ? , '%d/%m/%Y') ";

var replaces = ['EMPLOYEES', 'HIRE_DATE', '20/11/1995'];
sql = mysql.format(sql_template, replaces);

console.log("SQL="+ sql);
Ví dụ:
prepared-query-example.js
var mysql = require('mysql');

var conn = mysql.createConnection({
    database: 'mytestdb',
    host: "localhost",
    user: "root",
    password: "12345"
});


conn.connect(function(err) {
    if (err) throw err;

    console.log("Connected!");

    // Select * from EMPLOYEES where HIRE_DATE > STR_TO_DATE( '20/11/1995' , '%d/%m/%Y')
    var sql_template = "Select * from ?? where ?? > STR_TO_DATE( ? , '%d/%m/%Y') ";

    var replaces = ['EMPLOYEES', 'HIRE_DATE', '20/11/1995'];
    sql = mysql.format(sql_template, replaces);

    console.log("SQL=" + sql);
    console.log(" ************************ ");


    conn.query(sql, function(err, rows, fields) {
        if (err) throw err;
        for (var i = 0; i < rows.length; i++) {
            console.log("\n------ Row " + i + " ---- ");
            console.log(rows[i]);
            console.log("\n");
            console.log("  - Emp_No: " + rows[i].Emp_No)
            console.log("  - Full_Name: " + rows[i].Full_Name);
        }
    });

});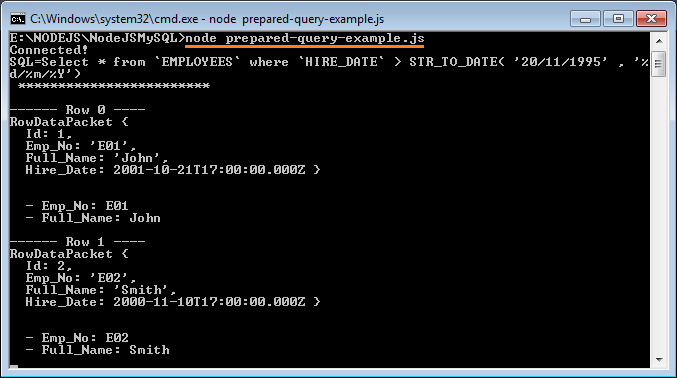
Data of rows:
[ RowDataPacket {
    Id: 1,
    Emp_No: 'E01',
    Full_Name: 'John',
    Hire_Date: 2001-10-21T17:00:00.000Z },

  RowDataPacket {
    Id: 2,
    Emp_No: 'E02',
    Full_Name: 'Smith',
    Hire_Date: 2000-11-10T17:00:00.000Z } ]
Data of fields
[ FieldPacket {
    catalog: 'def',
    db: 'mytestdb',
    table: 'EMPLOYEES',
    orgTable: 'employees',
    name: 'Id',
    orgName: 'Id',
    charsetNr: 63,
    length: 11,
    type: 3,
    flags: 16899,
    decimals: 0,
    default: undefined,
    zeroFill: false,
    protocol41: true },
  FieldPacket {
    catalog: 'def',
    db: 'mytestdb',
    table: 'EMPLOYEES',
    orgTable: 'employees',
    name: 'Emp_No',
    orgName: 'Emp_No',
    charsetNr: 33,
    length: 60,
    type: 253,
    flags: 0,
    decimals: 0,
    default: undefined,
    zeroFill: false,
    protocol41: true },
  FieldPacket {
    catalog: 'def',
    db: 'mytestdb',
    table: 'EMPLOYEES',
    orgTable: 'employees',
    name: 'Full_Name',
    orgName: 'Full_Name',
    charsetNr: 33,
    length: 765,
    type: 253,
    flags: 0,
    decimals: 0,
    default: undefined,
    zeroFill: false,
    protocol41: true },
  FieldPacket {
    catalog: 'def',
    db: 'mytestdb',
    table: 'EMPLOYEES',
    orgTable: 'employees',
    name: 'Hire_Date',
    orgName: 'Hire_Date',
    charsetNr: 63,
    length: 10,
    type: 10,
    flags: 128,
    decimals: 0,
    default: undefined,
    zeroFill: false,
    protocol41: true } ]
Anleitungen NodeJS
- Einführung in NodeJs
- Was ist NPM?
- Die Anleitung zum NodeJS für den Anfänger
- Installieren Sie den Atom Editor
- Installieren Sie NodeJS unter Windows
- Die Anleitung zu NodeJS Module
- Das Konzept von Callback in NodeJS
- Erstellen Sie einen einfachen HTTP-Server mit NodeJS
- Verständnis der Ereignisschleife (Event Loop) in NodeJS
- Die Anleitung zu NodeJS EventEmitter
- Stellen Sie in NodeJS eine Verbindung zur MySQL-Datenbank her
Show More