Die Anleitung zu Spring Boot und Thymeleaf
1. Was ist Thymeleaf ?
Thymeleaf ist ein JavaJava XML/XHTML/HTML5 Template Engine, das auf die Web-Umgebung und die Nicht-Web-Umgebung funktionieren kann. Es funktioniert besser bei der Umgang mitXHTML/HTML5 auf View Layer von der Applikation Web nach der Struktur MVC. Es kann eine File XML behandeln, sogar auf die offline Umgebung. Es unterstützt voll bei der Interaktion mit Spring Framework.
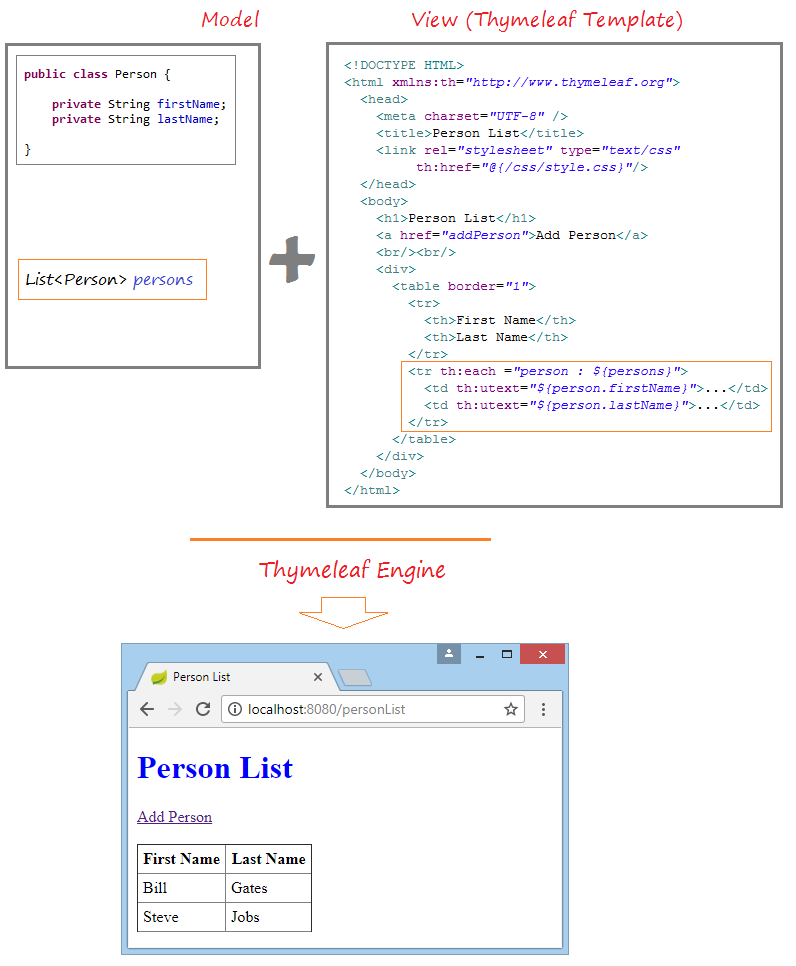
Die Template File von Thymeleaf ist eine normalen Text-File mit der Format XML/XHTML/HTML5. Thymeleaf Engine wird eine Template File lesen und mit den Objekte Java verbinden um ein anderes Dokument zu erstellen (generate) .
Thymeleaf kann benutzt werden um JSP auf View Layer der Applikation Web MVC zu ersetzen. Thymeleaf ist eine Open Source Code Software, die die Lizenz Apache 2.0. erhaltet
Unten ist das Bild der Applikation, die wir in dieser Unterricht durchführen

See Also:
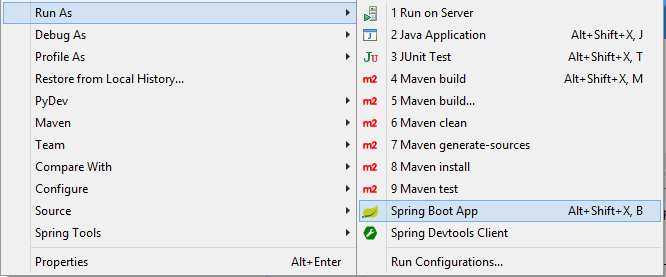
2. Die Erstellung von der Applikation
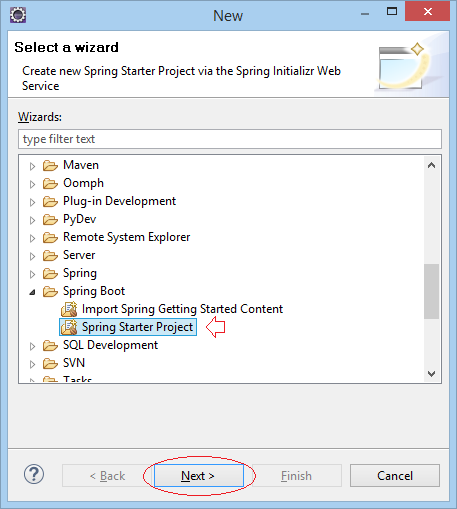
Auf Eclipse wählen Sie:
- File/New/Other...
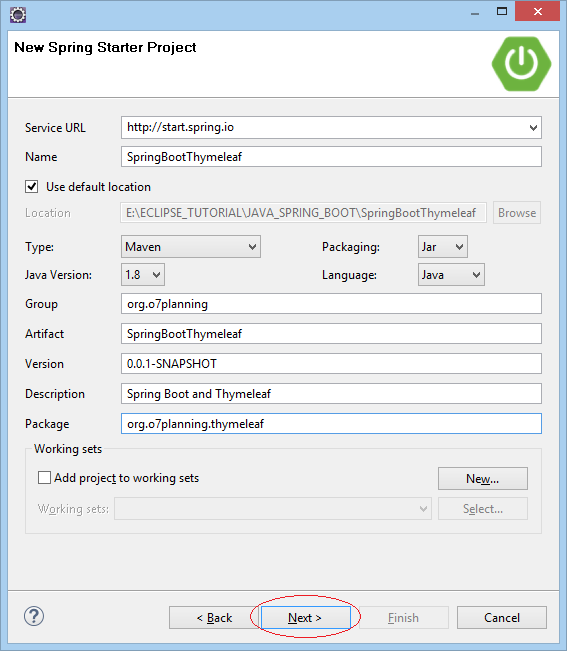
Geben Sie ein
- Name: SpringBootThymeleaf
- Group: org.o7planning
- Artifact: SpringBootThymeleaf
- Description: Spring Boot and Thymeleaf
- Package: org.o7planning.thymeleaf
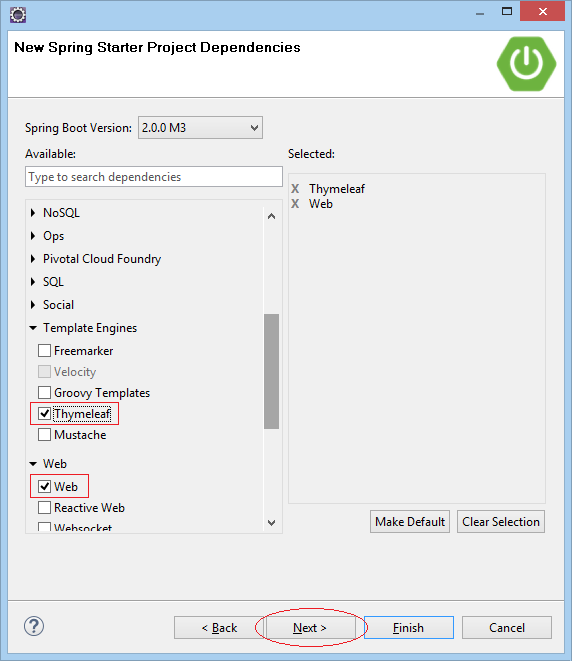
Wählen Sie 2 Technologie Web und Thymeleaf aus
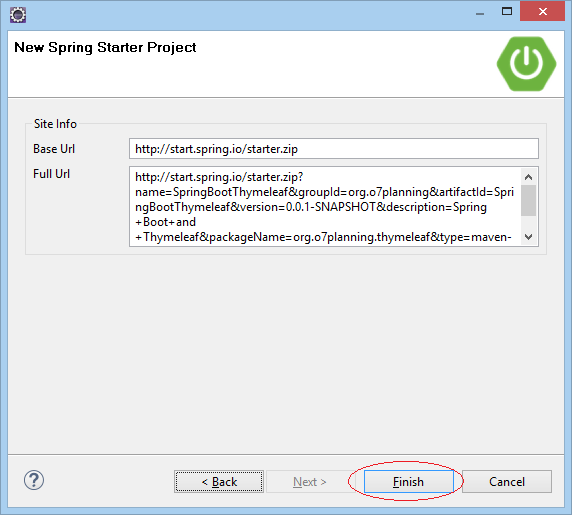
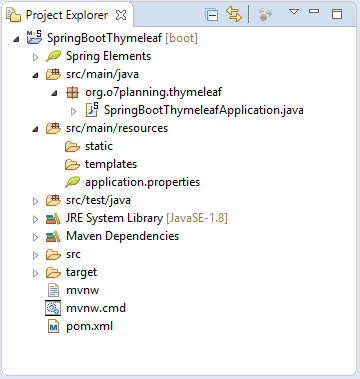
Ihr Projekt wird erstellt
pom.xml
<?xml version="1.0" encoding="UTF-8"?>
<project xmlns="http://maven.apache.org/POM/4.0.0"
    xmlns:xsi="http://www.w3.org/2001/XMLSchema-instance"
    xsi:schemaLocation="http://maven.apache.org/POM/4.0.0
         http://maven.apache.org/xsd/maven-4.0.0.xsd">
    <modelVersion>4.0.0</modelVersion>

    <groupId>org.o7planning</groupId>
    <artifactId>SpringBootThymeleaf</artifactId>
    <version>0.0.1-SNAPSHOT</version>
    <packaging>jar</packaging>

    <name>SpringBootThymeleaf</name>
    <description>Spring Boot and Thymeleaf</description>

    <parent>
        <groupId>org.springframework.boot</groupId>
        <artifactId>spring-boot-starter-parent</artifactId>
        <version>2.0.0.RELEASE</version>
        <relativePath/> <!-- lookup parent from repository -->
    </parent>

    <properties>
        <project.build.sourceEncoding>UTF-8</project.build.sourceEncoding>
        <project.reporting.outputEncoding>UTF-8</project.reporting.outputEncoding>
        <java.version>1.8</java.version>
    </properties>

    <dependencies>
        <dependency>
            <groupId>org.springframework.boot</groupId>
            <artifactId>spring-boot-starter-thymeleaf</artifactId>
        </dependency>
        <dependency>
            <groupId>org.springframework.boot</groupId>
            <artifactId>spring-boot-starter-web</artifactId>
        </dependency>

        <dependency>
            <groupId>org.springframework.boot</groupId>
            <artifactId>spring-boot-starter-test</artifactId>
            <scope>test</scope>
        </dependency>
    </dependencies>

    <build>
        <plugins>
            <plugin>
                <groupId>org.springframework.boot</groupId>
                <artifactId>spring-boot-maven-plugin</artifactId>
            </plugin>
        </plugins>
    </build>

</project>
3. Thymeleaf Template
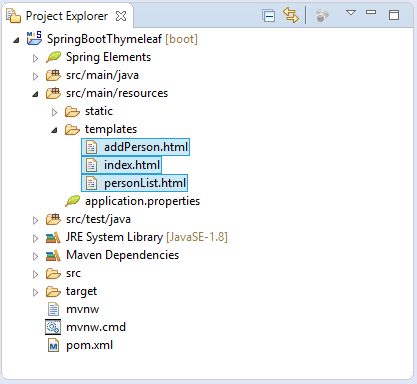
Thymeleaf Template ist die Template File. Ihre Inhalt liegt in der Format von XML/XHTML/HTML5. Wir werden 3 File erstellen und in den Verzeichnis src/main/resources/templates legen
index.html
<!DOCTYPE HTML>
<html xmlns:th="http://www.thymeleaf.org">
   <head>
      <meta charset="UTF-8" />
      <title>Welcome</title>
      <link rel="stylesheet" type="text/css" th:href="@{/css/style.css}"/>
   </head>
   <body>
      <h1>Welcome</h1>
      <h2 th:utext="${message}">..!..</h2>

      <!--

         In Thymeleaf the equivalent of
         JSP's ${pageContext.request.contextPath}/edit.html
         would be @{/edit.html}

         -->

      <a th:href="@{/personList}">Person List</a>

   </body>

</html>
personList.html
<!DOCTYPE HTML>
<html xmlns:th="http://www.thymeleaf.org">
   <head>
      <meta charset="UTF-8" />
      <title>Person List</title>
      <link rel="stylesheet" type="text/css" th:href="@{/css/style.css}"/>
   </head>
   <body>
      <h1>Person List</h1>
      <a href="addPerson">Add Person</a>
      <br/><br/>
      <div>
         <table border="1">
            <tr>
               <th>First Name</th>
               <th>Last Name</th>
            </tr>
            <tr th:each ="person : ${persons}">
               <td th:utext="${person.firstName}">...</td>
               <td th:utext="${person.lastName}">...</td>
            </tr>
         </table>
      </div>
   </body>
</html>
addPerson.html
<!DOCTYPE HTML>
<html xmlns:th="http://www.thymeleaf.org">
   <head>
      <meta charset="UTF-8" />
      <title>Add Person</title>
      <link rel="stylesheet" type="text/css" th:href="@{/css/style.css}"/>
   </head>
   <body>
      <h1>Create a Person:</h1>

      <!--
         In Thymeleaf the equivalent of
         JSP's ${pageContext.request.contextPath}/edit.html
         would be @{/edit.html}
         -->

      <form th:action="@{/addPerson}"
         th:object="${personForm}" method="POST">
         First Name:
         <input type="text" th:field="*{firstName}" />
         <br/>
         Last Name:
         <input type="text" th:field="*{lastName}" />
         <br/>
         <input type="submit" value="Create" />
      </form>

      <br/>

      <!-- Check if errorMessage is not null and not empty -->

      <div th:if="${errorMessage}" th:utext="${errorMessage}"
         style="color:red;font-style:italic;">
         ...
      </div>

   </body>
</html>
Oben habe ich 3 File HTML erstellt. Die File HTML oben müssen den Standards vom XML befriedigen. Alle Tags müssen die Öffnung und die Schließung haben. Zum Beispiel
<div>A div tag</div>

<br />

<meta charset="UTF-8" />
Alle File HTML sollen die Benutzung von Thymeleaf Namespace erklären:
<!-- Thymeleaf Namespace -->

<html xmlns:th="http://www.thymeleaf.org">
In die Template File gibt es die Thymeleaf Marker (die Markierung vom Thymeleaf). Sie sind die Anweisung, die Thymeleaf Engine bei der Datenverarbeitung hilft. Thymeleaf Engine analysiert die Template file und verbindet mit der Java Daten um ein neues Dokument zu erstellen (generate).

Unten sind das die Beispiele zur Benutzung von Context-Path im Thymeleaf:<!-- Example 1: --> <a th:href="@{/mypath/abc.html}">A Link</a> Output: ==> <a href="/my-context-path/mypath/abc.html">A Link</a> <!-- Example 2: --> <form th:action="@{/mypath/abc.html}" th:object="${personForm}" method="POST"> Output: ==> <form action="/my-context-path/mypath/abc.html" method="POST">
4. Static Resource & Properties File
Mit der static Ressourcen wie die File css, javascript, image,.. sollen Sie sie in dem Verzeichnis src/main/resources/static oder seinen Sub-Verzeichnis legen
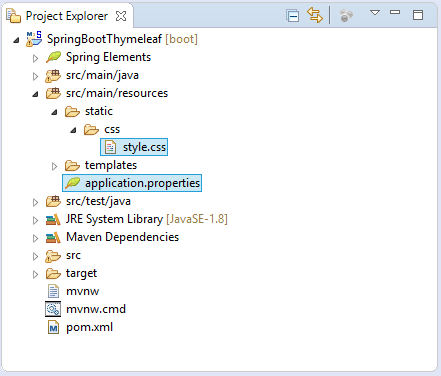
style.css
h1 {
    color:#0000FF;
}

h2 {
    color:#FF0000;
}

table {
    border-collapse: collapse;
}

table th, table td {
    padding: 5px;
}
application.properties
spring.thymeleaf.cache=false

welcome.message=Hello Thymeleaf
error.message=First Name & Last Name is required!
5. Model, Form, Controller classes
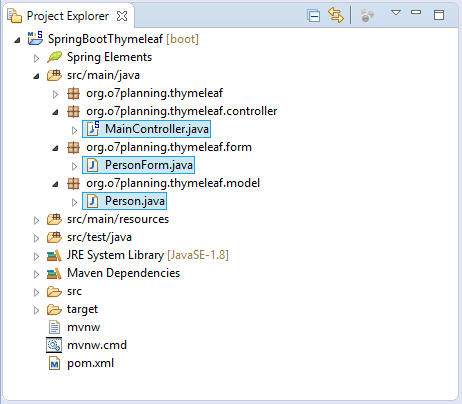
Person.java
package org.o7planning.thymeleaf.model;

public class Person {

    private String firstName;
    private String lastName;

    public Person() {

    }

    public Person(String firstName, String lastName) {
        this.firstName = firstName;
        this.lastName = lastName;
    }

    public String getFirstName() {
        return firstName;
    }

    public void setFirstName(String firstName) {
        this.firstName = firstName;
    }

    public String getLastName() {
        return lastName;
    }

    public void setLastName(String lastName) {
        this.lastName = lastName;
    }

}
Die Klasse PersonForm vertritt die Daten vom FORM wenn Sie einePerson auf die SeiteaddPerson erstellen.
PersonForm.java
package org.o7planning.thymeleaf.form;


public class PersonForm {

    private String firstName;
    private String lastName;

    public String getFirstName() {
        return firstName;
    }

    public void setFirstName(String firstName) {
        this.firstName = firstName;
    }

    public String getLastName() {
        return lastName;
    }

    public void setLastName(String lastName) {
        this.lastName = lastName;
    }

}
MainController ist eine Klasse Controller, die die Anforderung vom Benutzer behandelt und den Strom (flow) der Applikation kontrolliert.
MainController.java
package org.o7planning.thymeleaf.controller;

import java.util.ArrayList;
import java.util.List;

import org.o7planning.thymeleaf.form.PersonForm;
import org.o7planning.thymeleaf.model.Person;
import org.springframework.beans.factory.annotation.Value;
import org.springframework.stereotype.Controller;
import org.springframework.ui.Model;
import org.springframework.web.bind.annotation.ModelAttribute;
import org.springframework.web.bind.annotation.RequestMapping;
import org.springframework.web.bind.annotation.RequestMethod;

@Controller
public class MainController {

	private static List<Person> persons = new ArrayList<Person>();

	static {
		persons.add(new Person("Bill", "Gates"));
		persons.add(new Person("Steve", "Jobs"));
	}

	// Aus Application.properties abspritzen (inject).
	@Value("${welcome.message}")
	private String message;

	@Value("${error.message}")
	private String errorMessage;

	@RequestMapping(value = { "/", "/index" }, method = RequestMethod.GET)
	public String index(Model model) {

		model.addAttribute("message", message);

		return "index";
	}

	@RequestMapping(value = { "/personList" }, method = RequestMethod.GET)
	public String personList(Model model) {

		model.addAttribute("persons", persons);

		return "personList";
	}

	@RequestMapping(value = { "/addPerson" }, method = RequestMethod.GET)
	public String showAddPersonPage(Model model) {

		PersonForm personForm = new PersonForm();
		model.addAttribute("personForm", personForm);

		return "addPerson";
	}

	@RequestMapping(value = { "/addPerson" }, method = RequestMethod.POST)
	public String savePerson(Model model, //
			@ModelAttribute("personForm") PersonForm personForm) {

		String firstName = personForm.getFirstName();
		String lastName = personForm.getLastName();

		if (firstName != null && firstName.length() > 0 //
				&& lastName != null && lastName.length() > 0) {
			Person newPerson = new Person(firstName, lastName);
			persons.add(newPerson);

			return "redirect:/personList";
		}

		model.addAttribute("errorMessage", errorMessage);
		return "addPerson";
	}

}
Anleitungen Spring Boot
- Installieren Sie die Spring Tool Suite für Eclipse
- Die Anleitung zum Sping für den Anfänger
- Die Anleitung zum Spring Boot für den Anfänger
- Gemeinsame Eigenschaften von Spring Boot
- Die Anleitung zu Spring Boot und Thymeleaf
- Die Anleitung zu Spring Boot und FreeMarker
- Die Anleitung zu Spring Boot und Groovy
- Die Anleitung zu Spring Boot und Mustache
- Die Anleitung zu Spring Boot und JSP
- Die Anleitung zu Spring Boot, Apache Tiles, JSP
- Verwenden Sie Logging im Spring Boot
- Anwendungsüberwachung mit Spring Boot Actuator
- Erstellen Sie eine mehrsprachige Webanwendung mit Spring Boot
- Verwenden Sie im Spring Boot mehrere ViewResolver
- Verwenden Sie Twitter Bootstrap im Spring Boot
- Die Anleitung zu Spring Boot Interceptor
- Die Anleitung zu Spring Boot, Spring JDBC und Spring Transaction
- Die Anleitung zu Spring JDBC
- Die Anleitung zu Spring Boot, JPA und Spring Transaction
- Die Anleitung zu Spring Boot und Spring Data JPA
- Die Anleitung zu Spring Boot, Hibernate und Spring Transaction
- Spring Boot, JPA und H2-Datenbank integrieren
- Die Anleitung zu Spring Boot und MongoDB
- Verwenden Sie mehrere DataSource mit Spring Boot und JPA
- Verwenden Sie mehrere DataSource mit Spring Boot und RoutingDataSource
- Erstellen Sie eine Login-Anwendung mit Spring Boot, Spring Security, Spring JDBC
- Erstellen Sie eine Login-Anwendung mit Spring Boot, Spring Security, JPA
- Erstellen Sie eine Benutzerregistrierungsanwendung mit Spring Boot, Spring Form Validation
- Beispiel für OAuth2 Social Login im Spring Boot
- Führen Sie geplante Hintergrundaufgaben in Spring aus
- CRUD Restful Web Service Beispiel mit Spring Boot
- Beispiel Spring Boot Restful Client mit RestTemplate
- CRUD-Beispiel mit Spring Boot, REST und AngularJS
- Sichere Spring Boot RESTful Service mit Basic Authentication
- Sicherer Spring Boot RESTful Service mit Auth0 JWT
- Beispiel Upload file mit Spring Boot
- Beispiel Download File mit Spring Boot
- Das Beispiel: Spring Boot File Upload mit jQuery Ajax
- Das Beispiel File Upload mit Spring Boot und AngularJS
- Erstellen Sie eine Warenkorb-Webanwendung mit Spring Boot, Hibernate
- Die Anleitung zu Spring Email
- Erstellen Sie eine einfache Chat-Anwendung mit Spring Boot und Websocket
- Stellen Sie die Spring Boot-Anwendung auf Tomcat Server bereit
- Stellen Sie die Spring Boot-Anwendung auf Oracle WebLogic Server bereit
- Installieren Sie ein kostenloses Let's Encrypt SSL-Zertifikat für Spring Boot
- Konfigurieren Sie Spring Boot so, dass HTTP zu HTTPS umgeleitet wird
Show More