Erstellen Sie eine mehrsprachige Webanwendung mit Spring Boot
1. Das Zweck des Artikel
Manchmal brauchen Sie eine Multisprache Website machen. Eine Multisprache Website hilft bei der mehreren Zugang vom Benutzer. Die Multisprache Website wird auch als Internationalization (i18n) (Die Internationalisierung) gekennt, es ist umgekehrt mit Localization (L10n) (Die Lokalisierung).
Achtung: Internationalization ist eine 18 Buchstaben-Wort. die erste Buchstabe ist i und die letzte n. Deshalb wird es i18n verkürzen.
Spring bietet die Verlängerungsunterstützung für die Internationalisierung (Internationalization) (i18n) durch Spring Interceptor, Locale Resolvers và Resource Bundles für die unterschiedlichen Locale.
Im Artikel leite ich Sie bei der Aufbau einer Multisprache-Website durch Spring Boot an
Sie können das Beispiel vorsehen.
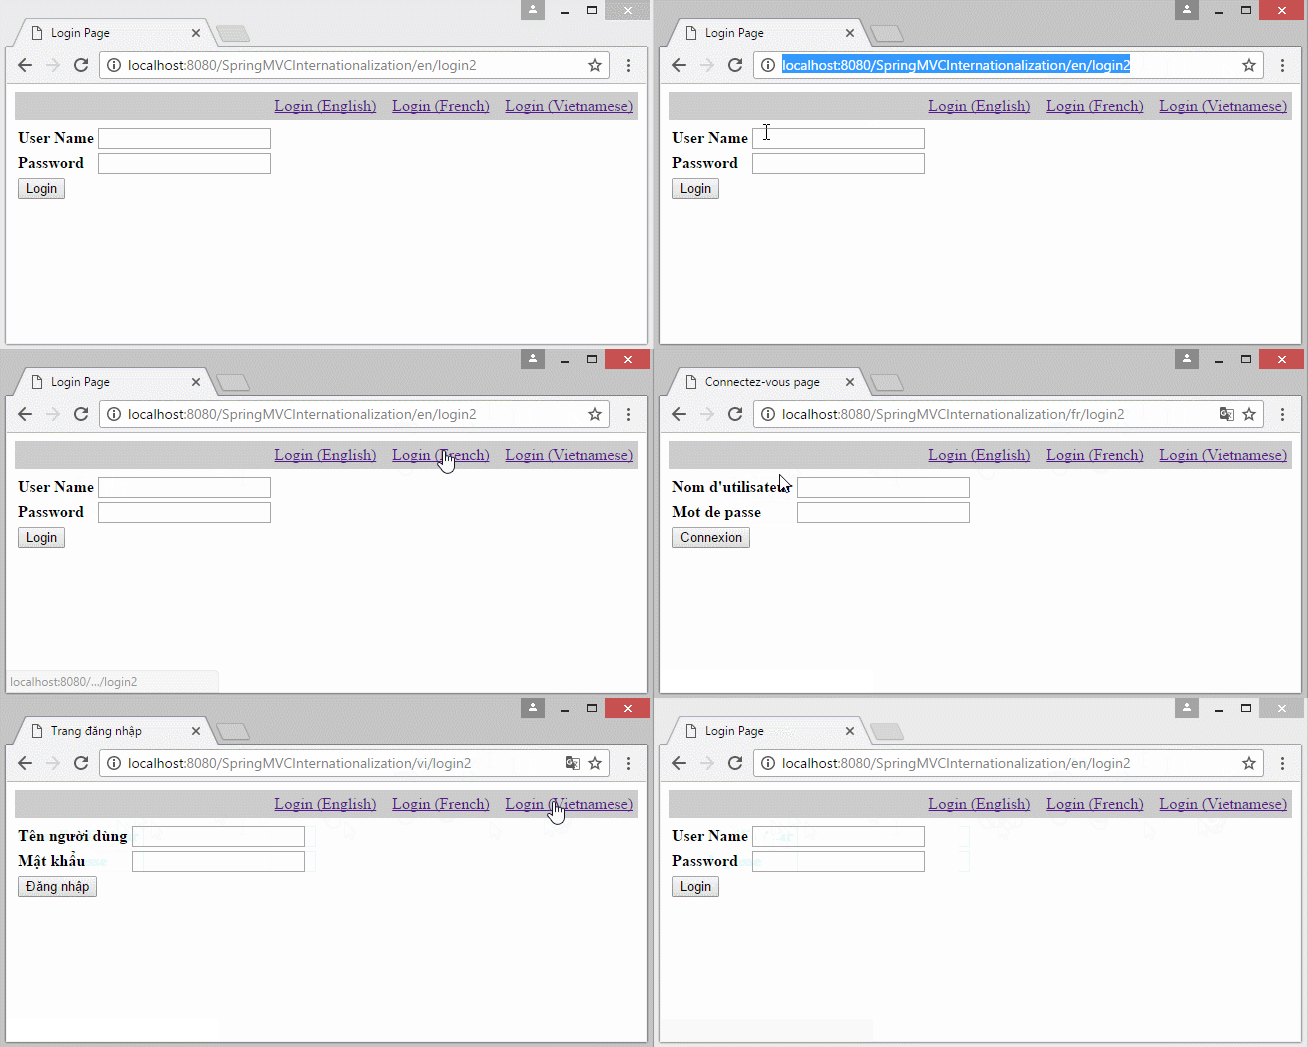
Im Beispiel liegt die lokale Information (Locale) auf dem Parameter vom URL. die Information Locale wird in Cookie archiviert. In den nächsten Seite wählt der Benutzer die Sprache nicht wieder
- http://localhost:8080/SomeContextPath/login1?lang=vi
- http://localhost:8080/SomeContextPath/login1?lang=fr
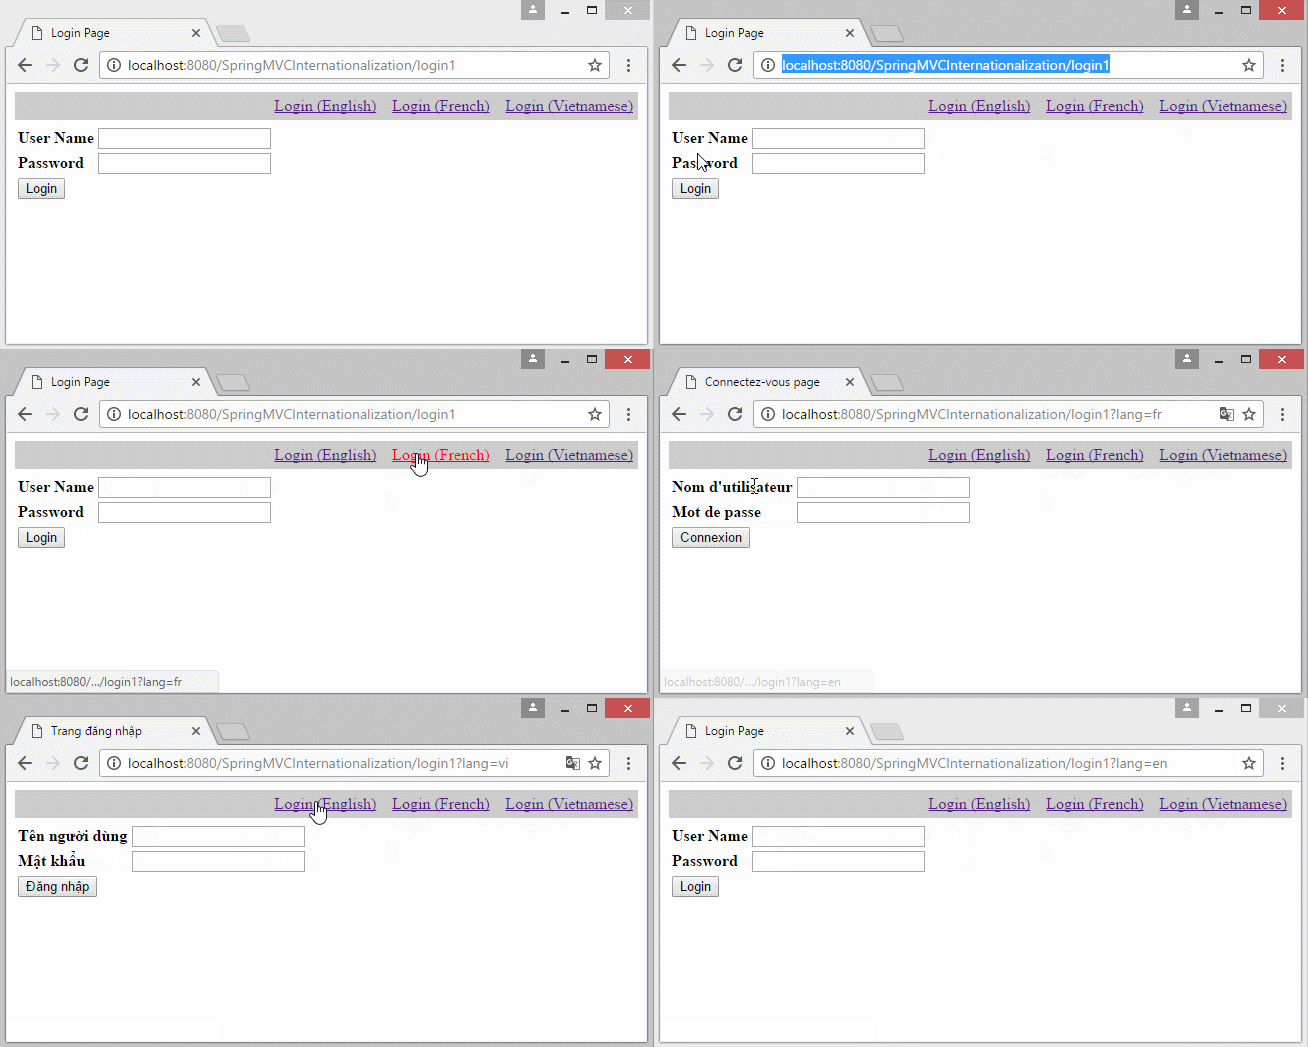
Ein anderes Beispiel mit der Information Locale auf URL:
- http://localhost:8080/SomeContextPath/vi/login2
- http://localhost:8080/SomeContextPath/en/login2
3. Message Resources
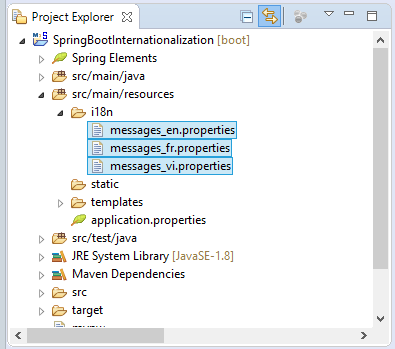
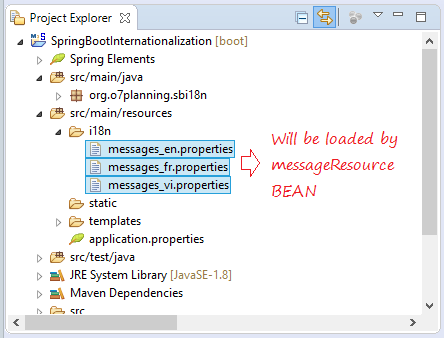
Hier erstelle ich 3 File properties für die Sprache Englisch, Französisch und Vietnamesisch. Die File werden durch messageResource Bean geladet (load) und verwaltet.
i18n/messages_en.properties
#Generated by Eclipse Messages Editor (Eclipse Babel)

label.password = Password
label.submit   = Login
label.title    = Login Page
label.userName = User Name
i18n/messages_fr.properties
#Generated by Eclipse Messages Editor (Eclipse Babel)

label.password = Mot de passe
label.submit   = Connexion
label.title    = Connectez-vous page
label.userName = Nom d'utilisateur
i18n/messages_vi.properties
#Generated by Eclipse Messages Editor (Eclipse Babel)

label.password = M\u1EADt kh\u1EA9u
label.submit   = \u0110\u0103ng nh\u1EADp
label.title    = Trang \u0111\u0103ng nh\u1EADp
label.userName = T\u00EAn ng\u01B0\u1EDDi d\u00F9ng
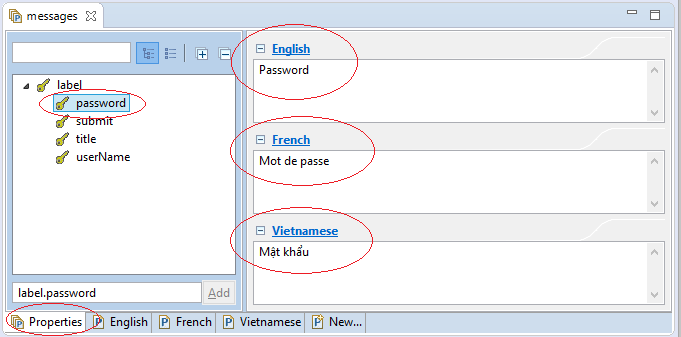
Eclipse unterstützt Sie bei der VEränderung der File-Inhalt durch "Message Editor".
4. Interceptor & LocaleResolver
Sie sollen 2 Spring BEANlocaleResolver und messageResource melden.
localeResolver - bestimmt die Maßnahme von der Benutzer zur Aufnahme der lokalen Information (Locale). CookieLocaleResolver liest die Information Locale aus Cookie,um zu wissen, in welcher Sprache der Benutzer die Website benutzt
messageResource - die File properties herunterladen.
localeResolver - bestimmt die Maßnahme von der Benutzer zur Aufnahme der lokalen Information (Locale). CookieLocaleResolver liest die Information Locale aus Cookie,um zu wissen, in welcher Sprache der Benutzer die Website benutzt
messageResource - die File properties herunterladen.
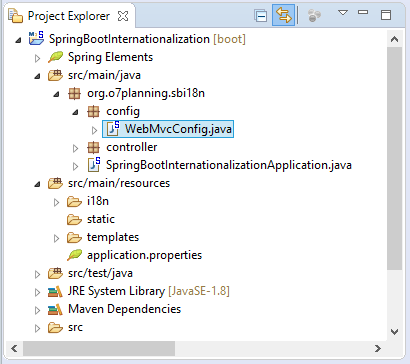
Bevor die Anforderung (request) durch Controller behandelt wird, muss es durch Interceptors durchgehen. Hier brauchen Sie LocaleChangeInterceptor registrieren.Das Interceptor behandelt die Änderung von Locale aus dem Benutzer.
WebMvcConfig.java
package org.o7planning.sbi18n.config;


import org.springframework.context.MessageSource;
import org.springframework.context.annotation.Bean;
import org.springframework.context.annotation.Configuration;
import org.springframework.context.support.ReloadableResourceBundleMessageSource;
import org.springframework.web.servlet.LocaleResolver;
import org.springframework.web.servlet.config.annotation.InterceptorRegistry;
import org.springframework.web.servlet.config.annotation.WebMvcConfigurer;
import org.springframework.web.servlet.i18n.CookieLocaleResolver;
import org.springframework.web.servlet.i18n.LocaleChangeInterceptor;

@Configuration
public class WebMvcConfig implements WebMvcConfigurer {


	@Bean(name = "localeResolver")
	public LocaleResolver getLocaleResolver()  {
		CookieLocaleResolver resolver= new CookieLocaleResolver();
		resolver.setCookieDomain("myAppLocaleCookie");
		// 60 minutes
		resolver.setCookieMaxAge(60*60);
		return resolver;
	}

	@Bean(name = "messageSource")
	public MessageSource getMessageResource()  {
		ReloadableResourceBundleMessageSource messageResource= new ReloadableResourceBundleMessageSource();

		// Read i18n/messages_xxx.properties file.
		// For example: i18n/messages_en.properties
		messageResource.setBasename("classpath:i18n/messages");
		messageResource.setDefaultEncoding("UTF-8");
		return messageResource;
	}
	@Override
	public void addInterceptors(InterceptorRegistry registry) {
		LocaleChangeInterceptor localeInterceptor = new LocaleChangeInterceptor();
		localeInterceptor.setParamName("lang");


		registry.addInterceptor(localeInterceptor).addPathPatterns("/*");
	}

}
5. Controller & Views
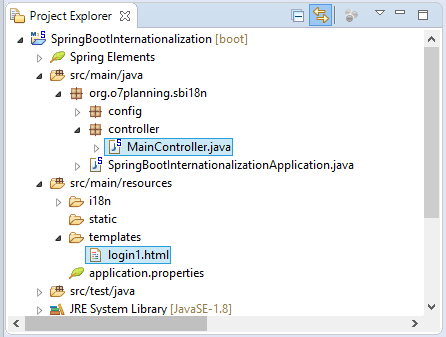
MainController.java (Locale on Parameter)
package org.o7planning.sbi18n.controller;

import org.springframework.stereotype.Controller;
import org.springframework.ui.Model;
import org.springframework.web.bind.annotation.RequestMapping;

@Controller
public class MainController {

    @RequestMapping(value = { "/", "/login1" })
    public String staticResource(Model model) {
        return "login1";
    }

}
login1.html (Thymeleaf View)
<!DOCTYPE HTML>
<html xmlns:th="http://www.thymeleaf.org">
<head>
<meta charset="UTF-8">
<title th:utext="#{label.title}"></title>
</head>
<body>
<div style="text-align: right;padding:5px;margin:5px 0px;background:#ccc;">
<a th:href="@{/login1?lang=en}">Login (English)</a>
|
<a th:href="@{/login1?lang=fr}">Login (French)</a>
|
<a th:href="@{/login1?lang=vi}">Login (Vietnamese)</a>
</div>
<form method="post" action="">
<table>
<tr>
<td>
<strong th:utext="#{label.userName}"></strong>
</td>
<td><input name="userName" /></td>
</tr>
<tr>
<td>
<strong th:utext="#{label.password}"></strong>
</td>
<td><input name="password" /></td>
</tr>
<tr>
<td colspan="2">
<input type="submit" th:value="#{label.submit}" />
</td>
</tr>
</table>
</form>
</body>
</html>Falls Sie die Technologie JSP auf View Layer.Mehr sehensrc/main/webapp/WEB-INF/jsp/login1.jsp (JSP View)<%@taglib uri="http://www.springframework.org/tags" prefix="spring"%> <%@ page contentType="text/html; charset=UTF-8" %> <%@ page session="false"%> <!DOCTYPE html> <html> <head> <meta charset="UTF-8"> <title><spring:message code="label.title" /></title> </head> <body> <div style="text-align: right;padding:5px;margin:5px 0px;background:#ccc;"> <a href="${pageContext.request.contextPath}/login1?lang=en">Login (English)</a> | <a href="${pageContext.request.contextPath}/login1?lang=fr">Login (French)</a> | <a href="${pageContext.request.contextPath}/login1?lang=vi">Login (Vietnamese)</a> </div> <form method="post" action=""> <table> <tr> <td> <strong> <spring:message code="label.userName" /> </strong> </td> <td><input name="userName" /></td> </tr> <tr> <td> <strong> <spring:message code="label.password" /> </strong> </td> <td><input name="password" /></td> </tr> <tr> <td colspan="2"> <spring:message code="label.submit" var="labelSubmit"></spring:message> <input type="submit" value="${labelSubmit}" /> </td> </tr> </table> </form> </body> </html>
6. Die Information Locale auf URL
Falls Sie eine Multisprache Website aufbauen möchten und die Information Locale auf URL liegen, sollen Sie einige Konfiguration ändern.
- http://localhost:8080/SomeContextPath/vi/login2
- http://localhost:8080/SomeContextPath/en/login2
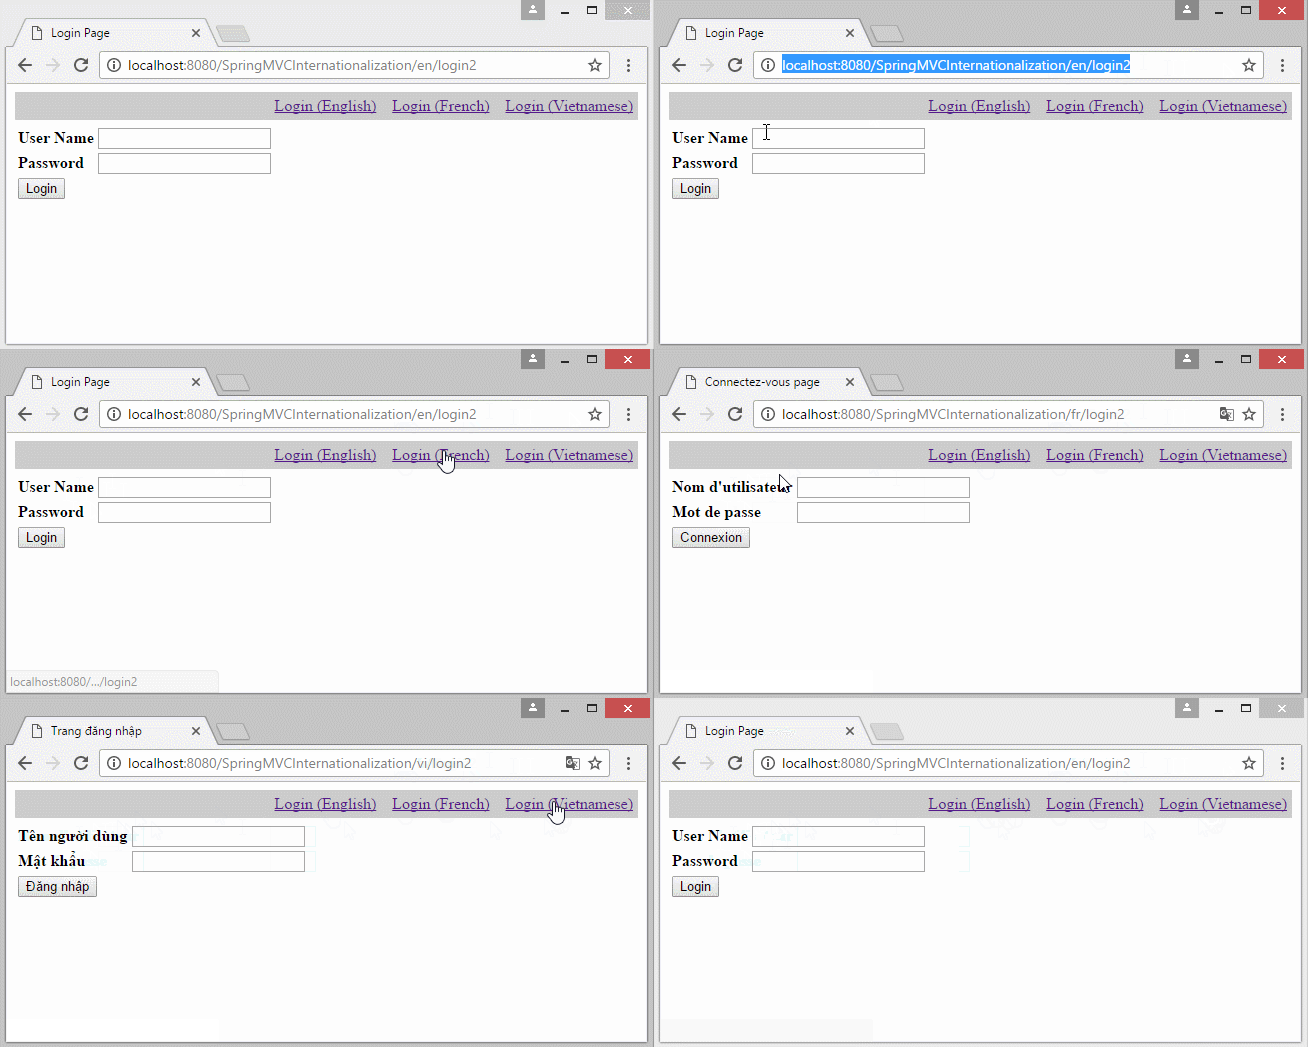
Erstellen Sie 2 Klasse UrlLocaleInterceptor und UrlLocaleResolver.
UrlLocaleInterceptor.java
package org.o7planning.sbi18n.interceptor;

import java.util.Locale;

import javax.servlet.http.HttpServletRequest;
import javax.servlet.http.HttpServletResponse;

import org.springframework.web.servlet.LocaleResolver;
import org.springframework.web.servlet.handler.HandlerInterceptorAdapter;
import org.springframework.web.servlet.support.RequestContextUtils;

public class UrlLocaleInterceptor extends HandlerInterceptorAdapter {

   @Override
   public boolean preHandle(HttpServletRequest request, HttpServletResponse response, Object handler)
           throws Exception {

       LocaleResolver localeResolver = RequestContextUtils.getLocaleResolver(request);

       if (localeResolver == null) {
           throw new IllegalStateException("No LocaleResolver found: not in a DispatcherServlet request?");
       }

       // Get Locale from LocaleResolver
       Locale locale = localeResolver.resolveLocale(request);

       localeResolver.setLocale(request, response, locale);

       return true;
   }

}
UrlLocaleResolver.java
package org.o7planning.sbi18n.resolver;

import java.util.Locale;

import javax.servlet.http.HttpServletRequest;
import javax.servlet.http.HttpServletResponse;

import org.springframework.web.servlet.LocaleResolver;

public class UrlLocaleResolver implements LocaleResolver {

    private static final String URL_LOCALE_ATTRIBUTE_NAME = "URL_LOCALE_ATTRIBUTE_NAME";

    @Override
    public Locale resolveLocale(HttpServletRequest request) {
        // ==> /SomeContextPath/en/...
        // ==> /SomeContextPath/fr/...
        // ==> /SomeContextPath/WEB-INF/pages/...
        String uri = request.getRequestURI();

        System.out.println("URI=" + uri);

        String prefixEn = request.getServletContext().getContextPath() + "/en/";
        String prefixFr = request.getServletContext().getContextPath() + "/fr/";
        String prefixVi = request.getServletContext().getContextPath() + "/vi/";

        Locale locale = null;

        // English
        if (uri.startsWith(prefixEn)) {
            locale = Locale.ENGLISH;
        }
        // French
        else if (uri.startsWith(prefixFr)) {
            locale = Locale.FRANCE;
        }
        // Vietnamese
        else if (uri.startsWith(prefixVi)) {
            locale = new Locale("vi", "VN");
        }
        if (locale != null) {
            request.getSession().setAttribute(URL_LOCALE_ATTRIBUTE_NAME, locale);
        }
        if (locale == null) {
            locale = (Locale) request.getSession().getAttribute(URL_LOCALE_ATTRIBUTE_NAME);
            if (locale == null) {
                locale = Locale.ENGLISH;
            }
        }
        return locale;
    }

    @Override
    public void setLocale(HttpServletRequest request, HttpServletResponse response, Locale locale) {
        // Nothing
    }

}
Ändern Sie die Konfiguration von Interceptor im WebMvcConfig:
WebMvcConfig.java
package org.o7planning.sbi18n.config;

import org.o7planning.sbi18n.interceptor.UrlLocaleInterceptor;
import org.o7planning.sbi18n.resolver.UrlLocaleResolver;
import org.springframework.context.MessageSource;
import org.springframework.context.annotation.Bean;
import org.springframework.context.annotation.Configuration;
import org.springframework.context.support.ReloadableResourceBundleMessageSource;
import org.springframework.web.servlet.LocaleResolver;
import org.springframework.web.servlet.config.annotation.InterceptorRegistry;
import org.springframework.web.servlet.config.annotation.WebMvcConfigurer;

@Configuration
public class WebMvcConfig implements WebMvcConfigurer {

	@Bean(name = "messageSource")
	public MessageSource getMessageResource() {
		ReloadableResourceBundleMessageSource messageResource = new ReloadableResourceBundleMessageSource();

		// Read i18n/messages_xxx.properties file.
		// For example: i18n/messages_en.properties
		messageResource.setBasename("classpath:i18n/messages");
		messageResource.setDefaultEncoding("UTF-8");
		return messageResource;
	}

	// To solver URL like:
	// /SomeContextPath/en/login2
	// /SomeContextPath/vi/login2
	// /SomeContextPath/fr/login2
	@Bean(name = "localeResolver")
	public LocaleResolver getLocaleResolver() {
		LocaleResolver resolver = new UrlLocaleResolver();
		return resolver;
	}

	@Override
	public void addInterceptors(InterceptorRegistry registry) {

		UrlLocaleInterceptor localeInterceptor = new UrlLocaleInterceptor();

		registry.addInterceptor(localeInterceptor).addPathPatterns("/en/*", "/fr/*", "/vi/*");
	}

}
Controller:
MainController2.java (Locale on URL)
package org.o7planning.sbi18n.controller;

import org.springframework.stereotype.Controller;
import org.springframework.ui.Model;
import org.springframework.web.bind.annotation.RequestMapping;

@Controller
public class MainController2 {

    @RequestMapping(value = "/{locale:en|fr|vi}/login2")
    public String login2(Model model) {
        return "login2";
    }

}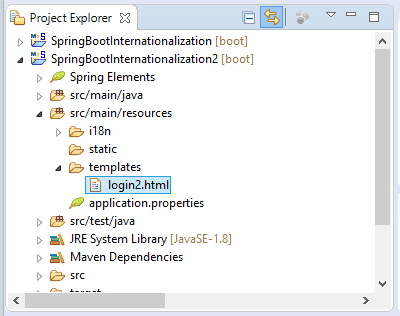
index2.html (Thymeleaf View)
<!DOCTYPE HTML>
<html xmlns:th="http://www.thymeleaf.org">
<head>
<meta charset="UTF-8">
<title th:utext="#{label.title}"></title>
</head>
<body>
<div style="text-align: right;padding:5px;margin:5px 0px;background:#ccc;">
<a th:href="@{/en/login2}">Login (English)</a>
|
<a th:href="@{/fr/login2}">Login (French)</a>
|
<a th:href="@{/vi/login2}">Login (Vietnamese)</a>
</div>
<form method="post" action="">
<table>
<tr>
<td>
<strong th:utext="#{label.userName}"></strong>
</td>
<td><input name="userName" /></td>
</tr>
<tr>
<td>
<strong th:utext="#{label.password}"></strong>
</td>
<td><input name="password" /></td>
</tr>
<tr>
<td colspan="2">
<input type="submit" th:value="#{label.submit}" />
</td>
</tr>
</table>
</form>
</body>
</html>login2.jsp (JSP View)<%@taglib uri="http://www.springframework.org/tags" prefix="spring"%> <%@ page contentType="text/html; charset=UTF-8" %> <%@ page session="false"%> <!DOCTYPE html> <html> <head> <meta charset="UTF-8"> <title><spring:message code="label.title" /></title> </head> <body> <div style="text-align: right;padding:5px;margin:5px 0px;background:#ccc;"> <a href="${pageContext.request.contextPath}/en/login2">Login (English)</a> | <a href="${pageContext.request.contextPath}/fr/login2">Login (French)</a> | <a href="${pageContext.request.contextPath}/vi/login2">Login (Vietnamese)</a> </div> <form method="post" action=""> <table> <tr> <td> <strong> <spring:message code="label.userName" /> </strong> </td> <td><input name="userName" /></td> </tr> <tr> <td> <strong> <spring:message code="label.password" /> </strong> </td> <td><input name="password" /></td> </tr> <tr> <td colspan="2"> <spring:message code="label.submit" var="labelSubmit"></spring:message> <input type="submit" value="${labelSubmit}" /> </td> </tr> </table> </form> </body> </html>
7. Die Multisprache Website mit der Inhalt in DB
Das Beispiel über die Multisprache Website oben kann Sie unzufrieden machen. Sie wünschen eine Website mit der mehreren Sprache und die Inhalt in DB. Eine Maßnahme, die Sie benutzen können sind die Benutzung vieler Datasource. Und jede datasource ist eine Database, die die Inhalt einer Sprache enthaltet.
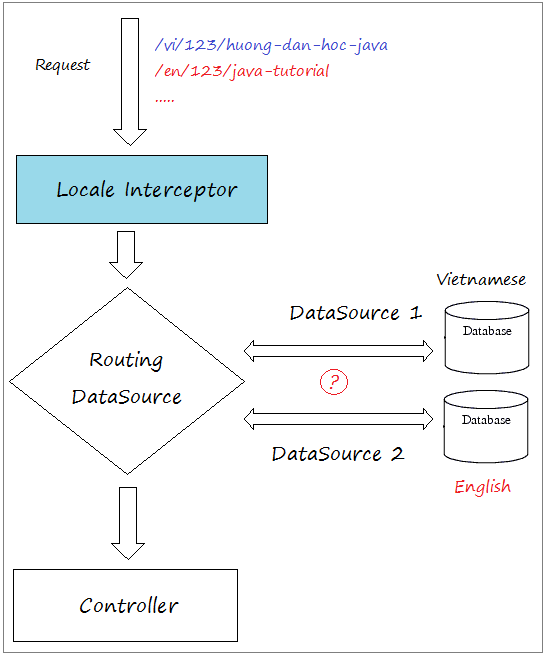
Sie können die Referenz bei... lesen
- TODO
Anleitungen Spring Boot
- Installieren Sie die Spring Tool Suite für Eclipse
- Die Anleitung zum Sping für den Anfänger
- Die Anleitung zum Spring Boot für den Anfänger
- Gemeinsame Eigenschaften von Spring Boot
- Die Anleitung zu Spring Boot und Thymeleaf
- Die Anleitung zu Spring Boot und FreeMarker
- Die Anleitung zu Spring Boot und Groovy
- Die Anleitung zu Spring Boot und Mustache
- Die Anleitung zu Spring Boot und JSP
- Die Anleitung zu Spring Boot, Apache Tiles, JSP
- Verwenden Sie Logging im Spring Boot
- Anwendungsüberwachung mit Spring Boot Actuator
- Erstellen Sie eine mehrsprachige Webanwendung mit Spring Boot
- Verwenden Sie im Spring Boot mehrere ViewResolver
- Verwenden Sie Twitter Bootstrap im Spring Boot
- Die Anleitung zu Spring Boot Interceptor
- Die Anleitung zu Spring Boot, Spring JDBC und Spring Transaction
- Die Anleitung zu Spring JDBC
- Die Anleitung zu Spring Boot, JPA und Spring Transaction
- Die Anleitung zu Spring Boot und Spring Data JPA
- Die Anleitung zu Spring Boot, Hibernate und Spring Transaction
- Spring Boot, JPA und H2-Datenbank integrieren
- Die Anleitung zu Spring Boot und MongoDB
- Verwenden Sie mehrere DataSource mit Spring Boot und JPA
- Verwenden Sie mehrere DataSource mit Spring Boot und RoutingDataSource
- Erstellen Sie eine Login-Anwendung mit Spring Boot, Spring Security, Spring JDBC
- Erstellen Sie eine Login-Anwendung mit Spring Boot, Spring Security, JPA
- Erstellen Sie eine Benutzerregistrierungsanwendung mit Spring Boot, Spring Form Validation
- Beispiel für OAuth2 Social Login im Spring Boot
- Führen Sie geplante Hintergrundaufgaben in Spring aus
- CRUD Restful Web Service Beispiel mit Spring Boot
- Beispiel Spring Boot Restful Client mit RestTemplate
- CRUD-Beispiel mit Spring Boot, REST und AngularJS
- Sichere Spring Boot RESTful Service mit Basic Authentication
- Sicherer Spring Boot RESTful Service mit Auth0 JWT
- Beispiel Upload file mit Spring Boot
- Beispiel Download File mit Spring Boot
- Das Beispiel: Spring Boot File Upload mit jQuery Ajax
- Das Beispiel File Upload mit Spring Boot und AngularJS
- Erstellen Sie eine Warenkorb-Webanwendung mit Spring Boot, Hibernate
- Die Anleitung zu Spring Email
- Erstellen Sie eine einfache Chat-Anwendung mit Spring Boot und Websocket
- Stellen Sie die Spring Boot-Anwendung auf Tomcat Server bereit
- Stellen Sie die Spring Boot-Anwendung auf Oracle WebLogic Server bereit
- Installieren Sie ein kostenloses Let's Encrypt SSL-Zertifikat für Spring Boot
- Konfigurieren Sie Spring Boot so, dass HTTP zu HTTPS umgeleitet wird
Show More
