Die Anleitung zu Google Maps Android API
1. Google Map API registrieren
Ihre Applikation hat die Element die Lankarte. Und die Daten der Landkarte liegt in dem Datenzentrum von Goole. Deshalb ruft Ihre Applikation ständig die Landkartendaten durch eine Dienstleistung ab

Obwohl ist das Landkartendatum der Google umsonst aber die Abrufung ist nicht willkürlich. Sie brauchen ein API Key, die so gleich wie ein Empfehlungsschreiben (Credentials) zum Zugang der Landkartendatum ist

Sie brauchen ein Google Map API Key registrieren. Das ist ganz frei. Sie können bei... lesen

2. Das Beispiel über Google Map
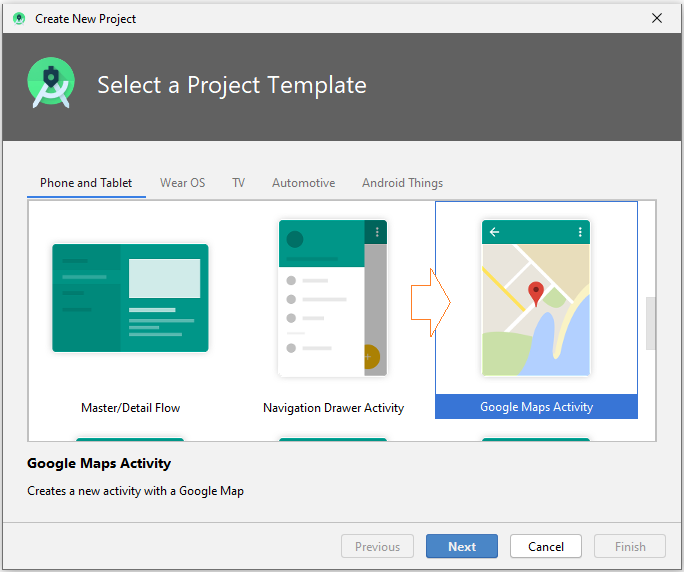
Android Studio unterstützt Sie bei der Erstellung eines Projekt mit Google Map sehr einfach und schnell
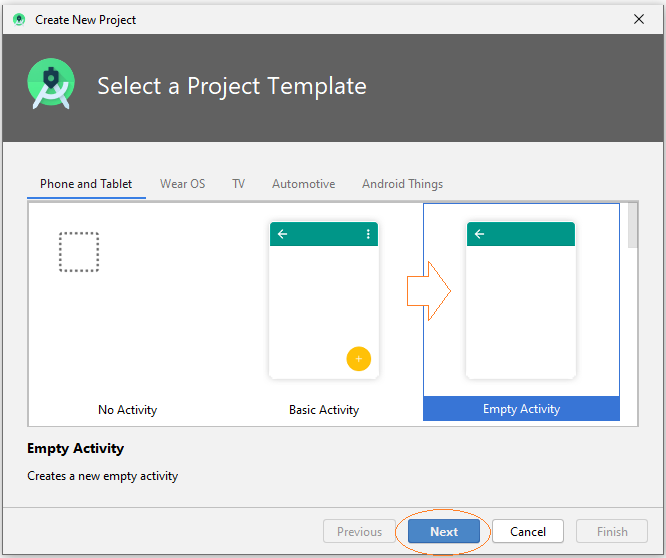
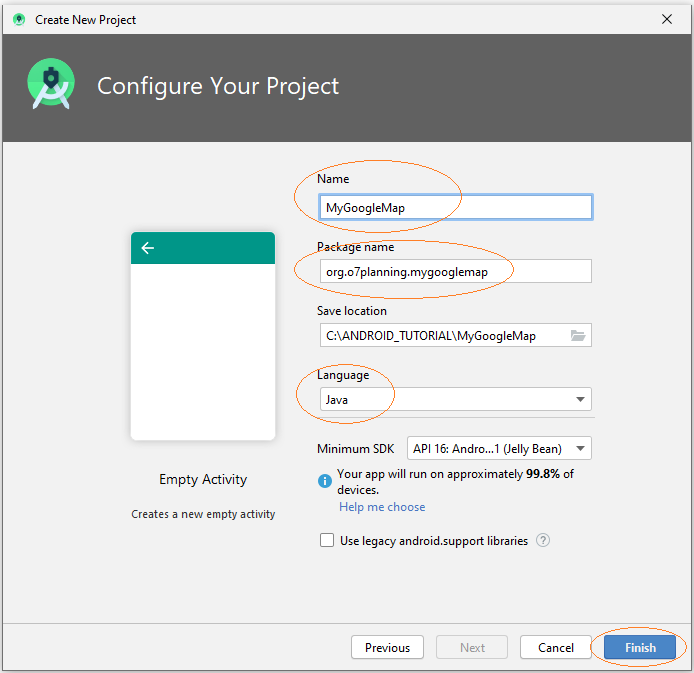
Allerdings erstelle ich ein Projekt und dann das Objekt Google Map in der Bildschirm ziehen und ablegen. Es ist vielleicht besser, wenn Sie alle Dinge gut verstehen. OK, auf Android Studio erstelle ich ein Projekt mit dem Name von MyGoogleMap.
- Name: MyGoogleMap
- Package name: org.o7planning.mygooglemap
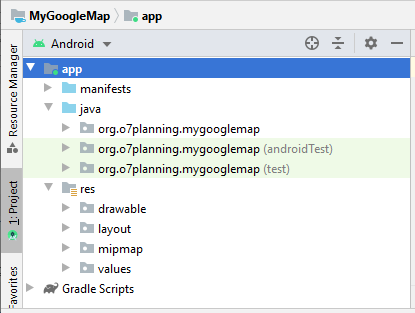
Ein leeres Projekt wurde erstellt
<!-- Add to AndroidManifest.xml -->

<uses-permission android:name="android.permission.INTERNET" />
<uses-permission android:name="android.permission.ACCESS_FINE_LOCATION" />
<uses-permission android:name="android.permission.ACCESS_COARSE_LOCATION" />
Google Map API Key
GoogleMap auf Android benutzt eine Dienstleistung um die Landkartendatum aus Goolge zu nehmen und sie anzuzeigen. Oben haben Sie ein Google Map API Key registriert. Sie sollen diesen Key in AndroidManifest.xml.melden
<meta-data
        android:name="com.google.android.geo.API_KEY"
android:value="YOUR_API_KEY"/>AndroidManifest.xml
<?xml version="1.0" encoding="utf-8"?>
<manifest xmlns:android="http://schemas.android.com/apk/res/android"
    package="org.o7planning.mygooglemap">


    <uses-permission android:name="android.permission.INTERNET" />
    <uses-permission android:name="android.permission.ACCESS_FINE_LOCATION" />
    <uses-permission android:name="android.permission.ACCESS_COARSE_LOCATION" />

    <application
        android:allowBackup="true"
        android:icon="@mipmap/ic_launcher"
        android:label="@string/app_name"
        android:roundIcon="@mipmap/ic_launcher_round"
        android:supportsRtl="true"
        android:theme="@style/AppTheme">

        <meta-data
            android:name="com.google.android.geo.API_KEY"
            android:value="YOUR_API_KEY" />


        <activity android:name=".MainActivity">
            <intent-filter>
                <action android:name="android.intent.action.MAIN" />

                <category android:name="android.intent.category.LAUNCHER" />
            </intent-filter>
        </activity>
    </application>

</manifest>
Next, you need to add the Google Map library to your project. On Android Studio select:
- File > Project Structure..
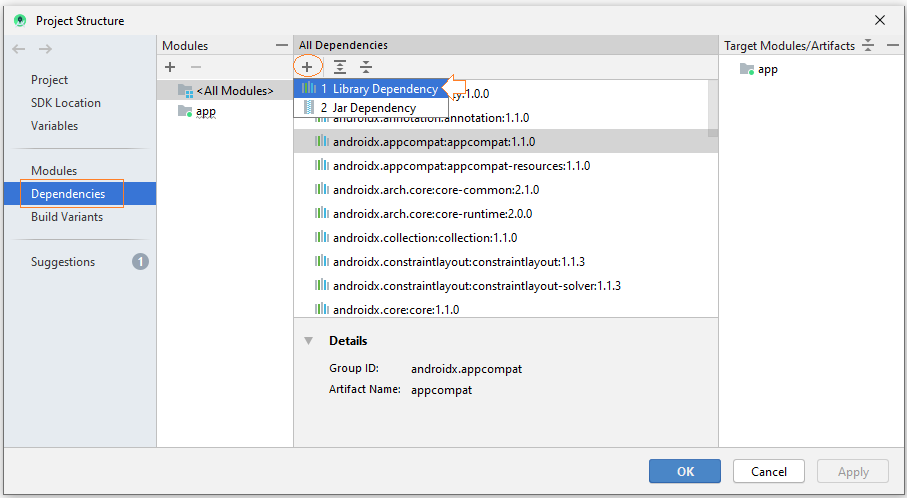
Search library with the keyword: "com.google.android.gms".
- com.google.android.gms:play-services-maps
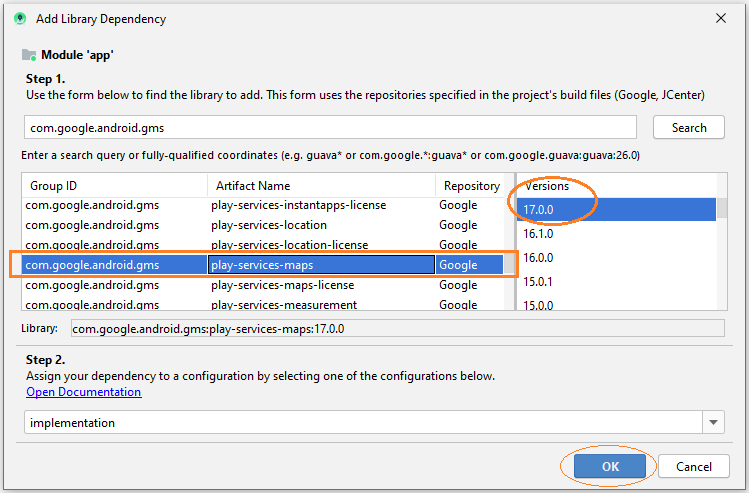
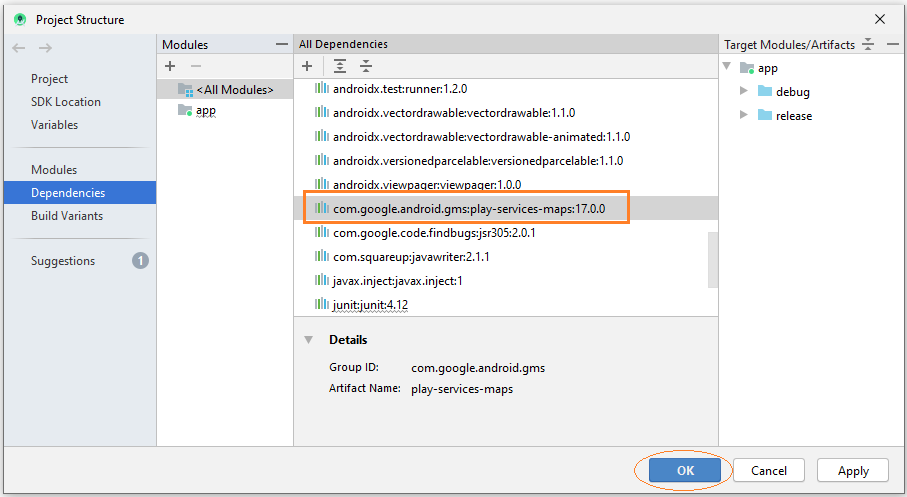
At this time, the library has been added to build.gradle (Module app).
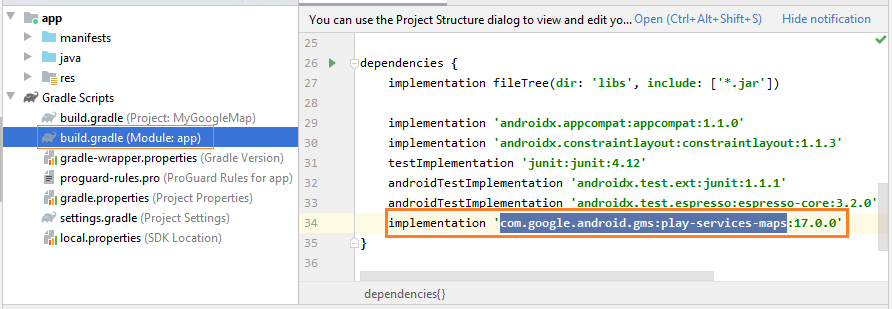
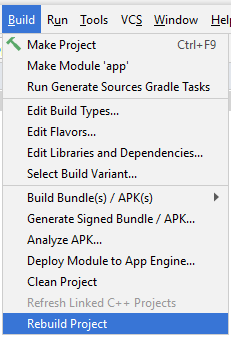
implementation 'com.google.android.gms:play-services-maps:17.0.0'Nach der Meldung der abhängigen Bibliothek sollen Sie das ganze Projekt wieder kompilieren
Map Fragment
MapFragment and SupportMapFragment are 2 fragments provided by the library, they contain GoogleMap, you can use either of these two fragments, or write a class inheriting from either of them.
MyMapFragment.java
package org.o7planning.mygooglemap;
import com.google.android.gms.maps.CameraUpdateFactory;
import com.google.android.gms.maps.GoogleMap;
import com.google.android.gms.maps.OnMapReadyCallback;
import com.google.android.gms.maps.SupportMapFragment;
import com.google.android.gms.maps.model.LatLng;
import com.google.android.gms.maps.model.MarkerOptions;
public class MyMapFragment extends SupportMapFragment implements OnMapReadyCallback {
private GoogleMap googleMap;
public MyMapFragment() {
getMapAsync(this);
}
@Override
public void onMapReady(final GoogleMap gmap) {
this.googleMap = gmap;
// Set default position
// Add a marker in Sydney and move the camera
LatLng vietnam = new LatLng(14.0583, 108.2772); // 14.0583° N, 108.2772° E
this.googleMap.addMarker(new MarkerOptions().position(vietnam).title("Marker in Vietnam"));
this.googleMap.moveCamera(CameraUpdateFactory.newLatLng(vietnam));
this.googleMap.setOnMapClickListener(new GoogleMap.OnMapClickListener() {
@Override
public void onMapClick(LatLng latLng) {
MarkerOptions markerOptions = new MarkerOptions();
markerOptions.position(latLng);
markerOptions.title(latLng.latitude + " : "+ latLng.longitude);
// Clear previously click position.
googleMap.clear();
// Zoom the Marker
googleMap.animateCamera(CameraUpdateFactory.newLatLngZoom(latLng, 10));
// Add Marker on Map
googleMap.addMarker(markerOptions);
}
});
}
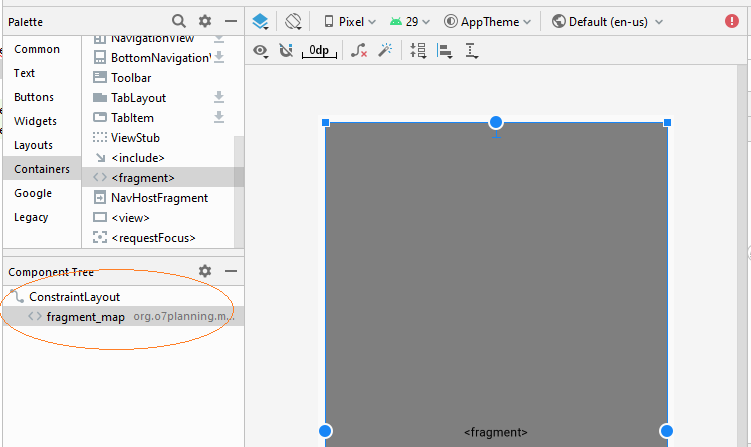
}Interface design of the application:
- activity_main.xml
Set ID for the components on the interface.
activity_main.xml
<?xml version="1.0" encoding="utf-8"?>
<androidx.constraintlayout.widget.ConstraintLayout
    xmlns:android="http://schemas.android.com/apk/res/android"
    xmlns:app="http://schemas.android.com/apk/res-auto"
    xmlns:tools="http://schemas.android.com/tools"
    android:layout_width="match_parent"
    android:layout_height="match_parent"
    tools:context=".MainActivity">

    <fragment
        android:id="@+id/fragment_map"
        android:name="org.o7planning.mygooglemap.MyMapFragment"
        android:layout_width="0dp"
        android:layout_height="0dp"
        android:layout_marginStart="8dp"
        android:layout_marginLeft="8dp"
        android:layout_marginTop="8dp"
        android:layout_marginEnd="8dp"
        android:layout_marginRight="8dp"
        android:layout_marginBottom="8dp"
        app:layout_constraintBottom_toBottomOf="parent"
        app:layout_constraintEnd_toEndOf="parent"
        app:layout_constraintStart_toStartOf="parent"
        app:layout_constraintTop_toTopOf="parent" />
</androidx.constraintlayout.widget.ConstraintLayout>
MainActivity.java
package org.o7planning.mygooglemap;
import androidx.appcompat.app.AppCompatActivity;
import android.os.Bundle;
import androidx.fragment.app.FragmentManager;
public class MainActivity extends AppCompatActivity {
private MyMapFragment myMapFragment;
@Override
protected void onCreate(Bundle savedInstanceState) {
super.onCreate(savedInstanceState);
setContentView(R.layout.activity_main);
FragmentManager fragmentManager = this.getSupportFragmentManager();
this.myMapFragment = (MyMapFragment) fragmentManager.findFragmentById(R.id.fragment_map);
}
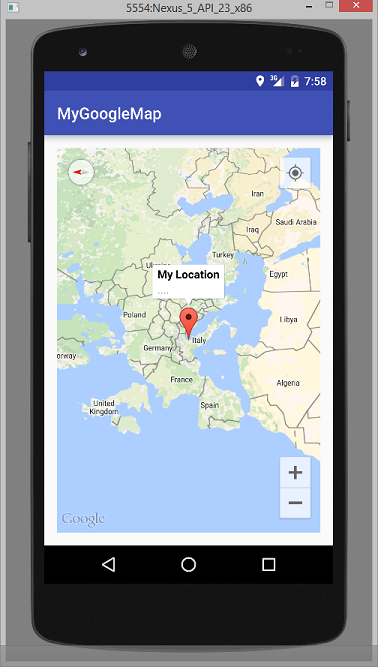
}Jetzt können Sie die Applikation starten
Anleitungen Android
- Konfigurieren Sie Android Emulator in Android Studio
- Die Anleitung zu Android ToggleButton
- Erstellen Sie einen einfachen File Finder Dialog in Android
- Die Anleitung zu Android TimePickerDialog
- Die Anleitung zu Android DatePickerDialog
- Was ist erforderlich, um mit Android zu beginnen?
- Installieren Sie Android Studio unter Windows
- Installieren Sie Intel® HAXM für Android Studio
- Die Anleitung zu Android AsyncTask
- Die Anleitung zu Android AsyncTaskLoader
- Die Anleitung zum Android für den Anfänger - Grundlegende Beispiele
- Woher weiß man die Telefonnummer von Android Emulator und ändere es
- Die Anleitung zu Android TextInputLayout
- Die Anleitung zu Android CardView
- Die Anleitung zu Android ViewPager2
- Holen Sie sich die Telefonnummer in Android mit TelephonyManager
- Die Anleitung zu Android Phone Calls
- Die Anleitung zu Android Wifi Scanning
- Die Anleitung zum Android 2D Game für den Anfänger
- Die Anleitung zu Android DialogFragment
- Die Anleitung zu Android CharacterPickerDialog
- Die Anleitung zum Android für den Anfänger - Hello Android
- Verwenden des Android Device File Explorer
- Aktivieren Sie USB Debugging auf einem Android-Gerät
- Die Anleitung zu Android UI Layouts
- Die Anleitung zu Android SMS
- Die Anleitung zu Android SQLite Database
- Die Anleitung zu Google Maps Android API
- Text zu Sprache in Android
- Die Anleitung zu Android Space
- Die Anleitung zu Android Toast
- Erstellen Sie einen benutzerdefinierten Android Toast
- Die Anleitung zu Android SnackBar
- Die Anleitung zu Android TextView
- Die Anleitung zu Android TextClock
- Die Anleitung zu Android EditText
- Die Anleitung zu Android TextWatcher
- Formatieren Sie die Kreditkartennummer mit Android TextWatcher
- Die Anleitung zu Android Clipboard
- Erstellen Sie einen einfachen File Chooser in Android
- Die Anleitung zu Android AutoCompleteTextView und MultiAutoCompleteTextView
- Die Anleitung zu Android ImageView
- Die Anleitung zu Android ImageSwitcher
- Die Anleitung zu Android ScrollView und HorizontalScrollView
- Die Anleitung zu Android WebView
- Die Anleitung zu Android SeekBar
- Die Anleitung zu Android Dialog
- Die Anleitung zu Android AlertDialog
- Die Anleitung zu Android RatingBar
- Die Anleitung zu Android ProgressBar
- Die Anleitung zu Android Spinner
- Die Anleitung zu Android Button
- Die Anleitung zu Android Switch
- Die Anleitung zu Android ImageButton
- Die Anleitung zu Android FloatingActionButton
- Die Anleitung zu Android CheckBox
- Die Anleitung zu Android RadioGroup und RadioButton
- Die Anleitung zu Android Chip und ChipGroup
- Verwenden Sie Image Asset und Icon Asset von Android Studio
- Richten Sie die SDCard für den Emulator ein
- ChipGroup und Chip Entry Beispiel
- Hinzufügen externer Bibliotheken zu Android Project in Android Studio
- Wie deaktiviere ich die Berechtigungen, die der Android-Anwendung bereits erteilt wurden?
- Wie entferne ich Anwendungen aus dem Android Emulator?
- Die Anleitung zu Android LinearLayout
- Die Anleitung zu Android TableLayout
- Die Anleitung zu Android FrameLayout
- Die Anleitung zu Android QuickContactBadge
- Die Anleitung zu Android StackView
- Die Anleitung zu Android Camera
- Die Anleitung zu Android MediaPlayer
- Die Anleitung zu Android VideoView
- Spielen Sie Sound-Effekte in Android mit SoundPool
- Die Anleitung zu Android Networking
- Die Anleitung zu Android JSON Parser
- Die Anleitung zu Android SharedPreferences
- Die Anleitung zu Android Internal Storage
- Die Anleitung zu Android External Storage
- Die Anleitung zu Android Intents
- Beispiel für eine explizite Android Intent, nennen Sie eine andere Intent
- Beispiel für implizite Android Intent, Öffnen Sie eine URL, senden Sie eine Email
- Die Anleitung zu Android Services
- Die Anleitung zu Android Notifications
- Die Anleitung zu Android DatePicker
- Die Anleitung zu Android TimePicker
- Die Anleitung zu Android Chronometer
- Die Anleitung zu Android OptionMenu
- Die Anleitung zu Android ContextMenu
- Die Anleitung zu Android PopupMenu
- Die Anleitung zu Android Fragment
- Die Anleitung zu Android ListView
- Android ListView mit Checkbox verwenden ArrayAdapter
- Die Anleitung zu Android GridView
Show More